Tent Setup Guide 6004
TrailerCampers.com
Camping Made Easy
Tent Setup Guide
Hello, and welcome to the Tent Setup Guide from TrailerCampers.com. Our motto is "Camping Made Easy", and so we have produced this illustrated guide to help you become familiar with the process of setting up your tent.
Different people bring different levels of experience to camping, some will not need this guide at all, some may need a few pointers, and some may be setting up a tent for the very first time. We have written this guide with the latter group in mind, and so have set carefully set out every step and accompanied it with lots of photos. The result of this however is a guide that appears rather long, whereas in reality it all comes together very quickly. We would rather provide too much information (that you can skip over), than too little and have people scratching their heads in bewilderment. After you have set up your tent a few times you will probably not need this guide as it is so straightforward, but its always helpful to have a reference just in case.
We highly recommend that you take your tent though a practice run (or two) before you actually go camping. This allows you to get familiar with the tent and how it operates under a no pressure situation. When you have put the tent up a few times, you will find that you can have the main tent erected in under 10 minutes.
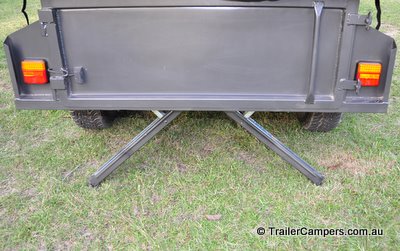 |
First park your trailer in a suitable position. Ensure that it is safe and chock your wheels if necessary. Use your jockey wheel to get the trailer level and then wind down the back stabilisers if you have them. Your trailer should now be secure and unable to move. It is also a good idea to remove any rocks and sticks where the tent will unfold. |
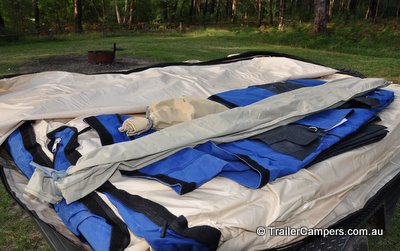 |
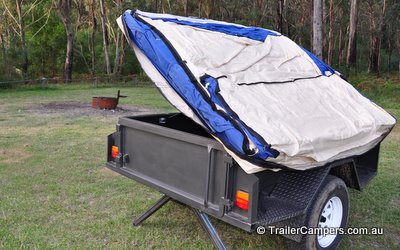
Next unzip the travel cover, the zip starts at the middle of the tailgate. Open this up and remove the loose items stored on top. This includes the annex wall, annex floor, tailgate skirt, pole bag, peg bag and water-guide pad. Also remove the bag containing the ladder if this has been stored with the tent. |
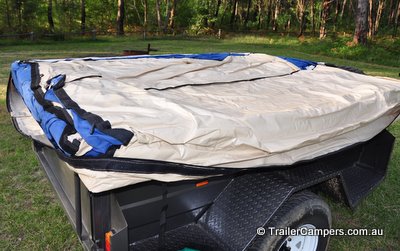 |
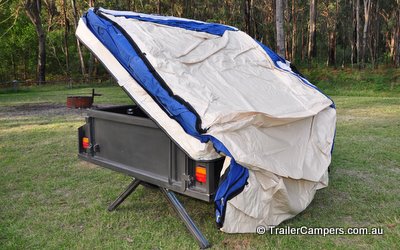
The travel cover and loose items should now be completely removed, and your tent should look like this. You can now fold down the zip that the travel cover attaches to, so it hangs vertically down around all sides of the trailer. |
 |
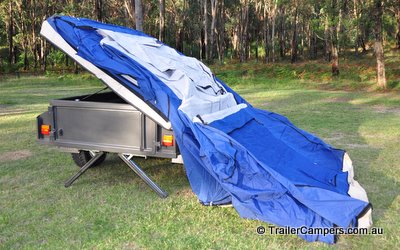
Now lift the top of the camper trailer as shown, this makes it easier to open the tent. If your tent has not been installed on the trailer with a hinge and gas struts, then this step is not necessary. |
 |
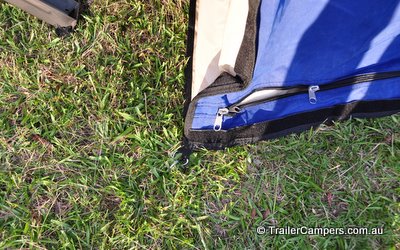
Unfold the first layer that covers the trailer wheel and side. Peg near the trailer tailgate and near the front so that it is vertical. When putting in pegs, put them in on an angle (so the top of the peg is further out from the tent) so that they do not pull out easily. |
 |
Slide the right section of the tent off the trailer as shown, you will feel two sets of poles under the canvas that will move with this section. |
 |
To make the next step easier, unzip the tent door a small way. The small zip at the right hand end of the front wall should also be open. This enables air to enter the tent when you are pulling it up. |
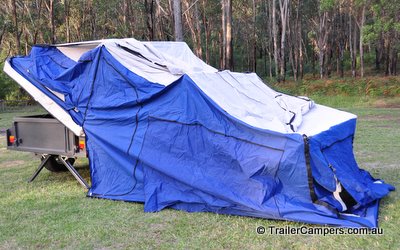 |
Pull out the lower part of the tent and peg the right hand end as shown. The base of the tent should now be taunt. |
 |
Lower the trailer top and fasten catches to prevent movement. Before you do this you may like to remove any large items that are not convenient to remove through the tailgate or access hatches. |
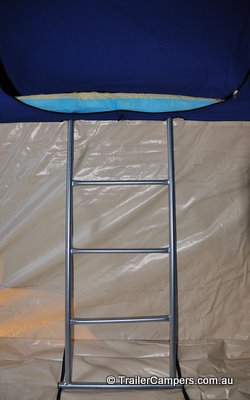 |
Open the tent door and take the ladder in (after removing it from its canvas bag). Install the ladder so that the top angled legs go through the holes provided in the privacy shield and under the mattress. The base of the ladder should sit upon the PVC flap which is designed to prevent wear of the main tent floor. |
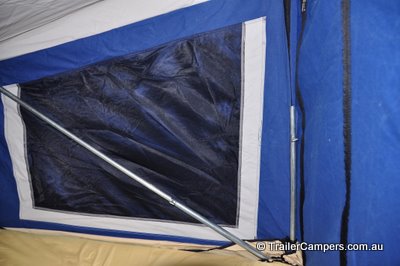 |
Open the U shaped door in the privacy screen and climb up the ladder onto the mattress. Extend the two poles at both ends and then fix them in place using the inbuilt clamp. Do not overextend these poles (or any of the others) otherwise you can damage your tent at the stitching points. It is important not to have the poles too tight or too loose, otherwise it will be difficult to attach the annex later. |
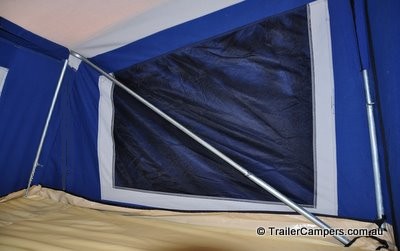 |
From the pole bag extract the two shortest poles. These have a plastic bracket on one end and are labelled with the number 5. Take these back up on top of the mattress and fix the plastic bracket onto the lower horizontal pole near the tent wall (one at either end). Then extend these so that the bottom of the pole sits between the PVC shield and the mattress along the side wall. Adjust the length to bring the tent into the appropriate shape. |
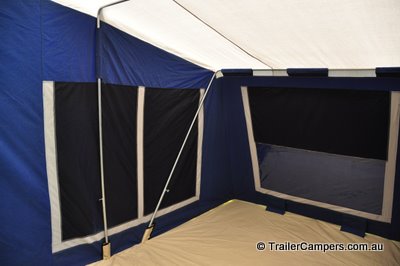 |
Check that the bottom of the poles in the right hand end of the main tent are still in their pockets. Extend both poles (on both sides) to bring the tent into the appropriate shape, and then fix with the inbuilt clamps. Once again be careful not to overextend these. Now close the small air inlet zip at the front bottom right. |
 |
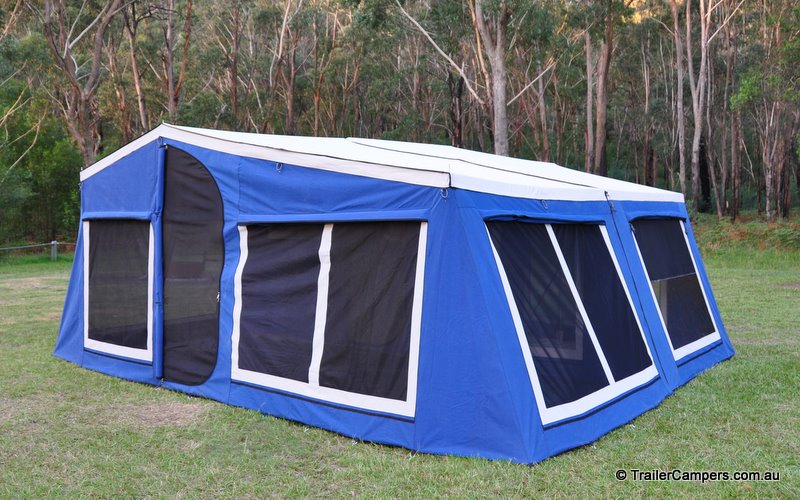
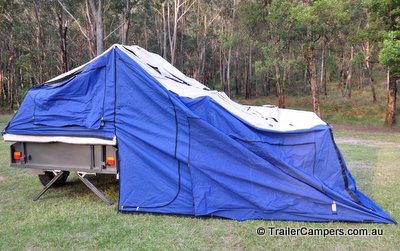
Congratulations, you have now got the main tent fully erected and it should look like this. Go around and make sure you have all pegs inserted and none have pulled out. If you have just stopped overnight you may like to leave the tent like this, otherwise you can continue to set up the awning. |
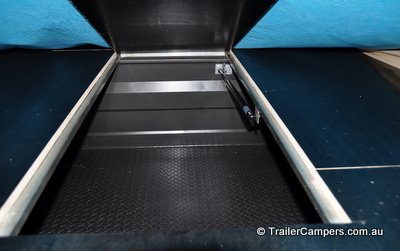 |
Remember you have two access hatches underneath the mattress that you can use to access the trailer, as well as access through the tailgate. |
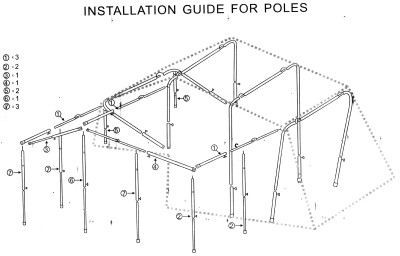 |
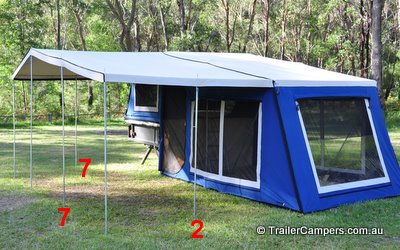
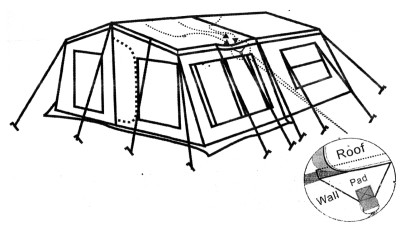
To set up the awning you now need to empty the poles out of the pole bag and sort them according to their numbers. Don't be daunted by the diagram here, it is actually much simpler than it first appears. We'll walk you through it in the next few steps. |
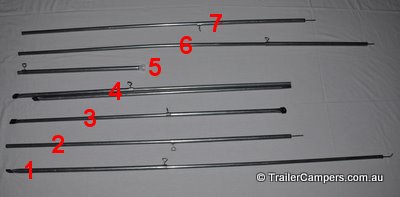 |
There are three number 1 poles that have a hook in the end for fitting to the main tent structure. There are two spreader poles, these have plastic fittings with holes at both ends, number 3 is the shorter one and number 4 the longer. There are three types of upright poles (they have a spike on top), a long number 6 for the middle, two short number 2 for the right hand side, and three medium number 7 for everywhere else. Only one of each type is shown in this photo, remember you have already used the number 5 poles. |
 |
Take the three number 1 poles with the hook in the end and insert them through the holes in the front of the tent so that the hook goes into the hole in the main tent support. There are three locations where this occurs, at the right end, the left end, and the highest point in the middle. The photo here is taken from inside the main tent so you can see the connection easier. |
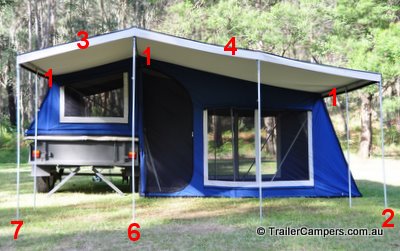 |
Use the long number 6 upright to support the front of the middle number 1 pole. Next use a medium number 7 upright to support the left number 1 and fit the short number 3 spreader between the two uprights. Now use a number 2 upright to support the right number 1 and fit the number 4 spreader between it and the centre upright. Make sure the clamps on the spreader bars all point downwards. |
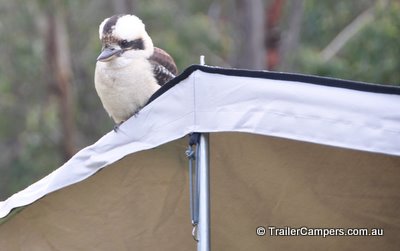 |
Now unfold the awning roof from the main tent and bring it over the pole structure. Insert the tops of the uprights into the metal eyes in the tent, and then stretch the hooks on rubber straps till the hooks can be put into the holes in the uprights (a couple of inches down). Adjust poles and spreaders until the awning is in shape and taunt. Kookaburra supervision is optional. |
 |
If you wish to use the annex walls skip to the next step, otherwise you can stop here and add the remaining uprights. Number 2 goes on the left side and the number 7 goes on the right side and at the front. There are rain caps to fit to the top of the upright poles in the peg bag (to prevent water ingress through the holes) and you can fit these now. |
 |
Unclip the hook on the highest centre pole (you can unclip the remainder as you come to them), and start to Velcro the annex walls to the awning. Work from the centre pole outwards to the sides and then back to the main tent where you can then Velcro the sides together. |
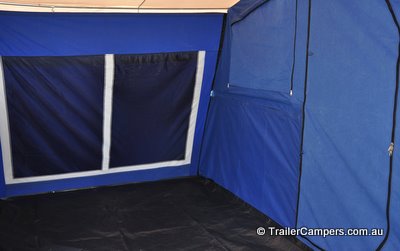 |
Take the tailgate skirt and Velcro it to the main tent and the annex wall. It is now time to go around and peg out the annex wall to bring it into shape and make it taunt. |
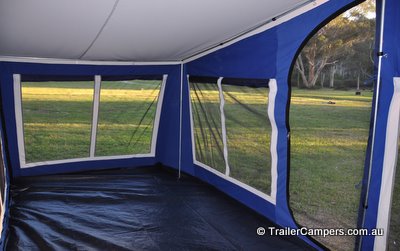 |
The annex floor can now be attached to the Velco at the base of the wall if you wish. If you are not using the annex for sleeping then you may prefer to have a grassy floor where spills don't matter. When removing the annex floor please do so carefully in small segments, as the long Velcro strips can result in very strong attachment. |
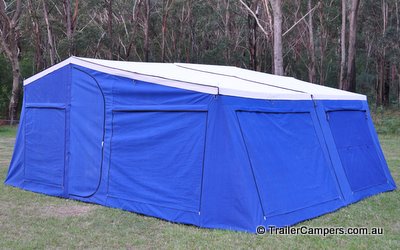 |
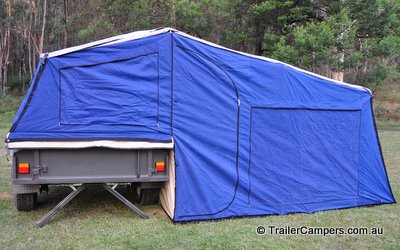
Well done, you now have your tent completely assembled and it should look like this. If you are expecting wet weather conditions you can add the extra poles in (number 2 at the left, number 7 at the right and front) and put the rain caps on the top of the uprights. |
 |
If you are expecting extreme weather there are guy ropes attached to the main tent. The guy ropes for the annex are in the peg bag and should be attached to the top of the poles, not to the hook or rubber straps. Peg out the guy ropes and tighten until the tent roof is flat. Attach the water-guide pad between the annex wall and awning, half way between the middle pole on the right side and the main tent, tighten this to help the water run off. |